Focusing
The use of focusing is to allow selected areas of an image to be clearer as it gives it much more detail. (Changing depth of field)Definition of focus:
- To cause light rays to converge on or towards a central point.
- To focus.
- To render an object or image in clear outline or sharp detail by adjusting vision or on an optical device.
Light
Light travels in straight lines, and the rays diverge from each other. The lens refracts the light rays onto a certain point which becomes the focal point.
Camera Settings
Auto Focus - Camera automatically focuses and 'locks' on a part of a scene which it (the camera) considers to be the important.
Manual Focus - The photographer physically controls the focus.
1)One Shot AF (Canon)
Single - Servo AF (Nikon)
This setting is used when taking a photo of still life, or when there is close to no movement. Once the auto focus has achieved focus, the setting locks.
2) Al Servo
This setting tracks focus on a moving object. Whether the object is moving closer or further from the camera, it stays in sharp focus.
Focal LengthFocal length is measured in mm, it is a measurement of the distance that the light rays converge to form the image. The focal length tells us the angle of view (how much of an area is in view). The longer the focal length, the lower the angle of view and the higher the magnification of elements (300 mm) . The shorter the focal length, the wider of view and the lower the magnification (18 mm).
Lenses
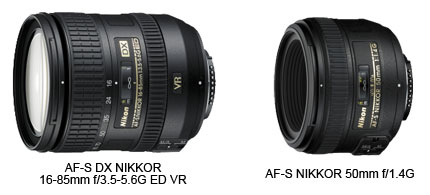
- Normal / standard lenses are 50 mm which is the equivalent to the human eye.
Zoom Lens - Variable focal length
Prime Lens - Set focal length
- Normal / standard lenses are 50 mm which is the equivalent to the human eye.
Zoom Lens - Variable focal length
Prime Lens - Set focal length


