35mm SLR Camera
35mm refers to the width of the film that the camera holds. 'SLR' stands for Single Lens Reflex, which means the lens that provides the image onto the film, also provides the image seen through the view finder. The benefit of this camera is that you can change the lens easily so that it is suitable for the subject that is being photographed. For example, Macro Lenses for smaller subjects (i;e bugs,plants,small objects) The disadvantage of these cameras is that they can be quite heavy to carry around. Another disadvantage is that the mirror has to lift out of the way to expose the film, the image made on the film will be slightly different from what you see due to time delay.
 Resources:
1) http://www.geometer.org/beginner/slr.html
2) http://electronics.howstuffworks.com/camera5.htm
3) http://hyperphysics.phy-astr.gsu.edu/hbase/geoopt/slr.html
Medium Format Camera and Large Format Camera
Medium Format Camera
A Medium Format Camera is a originally a SLR film (but later developed as a camera that uses negatives larger than 35mm and a larger sensor. This allows higher quality photographs which is good for professional photos because the negatives don't need enlarging as much therefore the prints show less grain and the tonal range is more accurate when the negative is bigger. The disadvantages of this camera is that they are slower to use, heavier, and do not work as well in low light whereas the 35mm does. A popular subject for this camera is portraiture.
Film:
120 Film
This film is a black paper roll in which the film is taped into, this travels through the camera as you shoot. The black paper allows you to change the film during the light. The film comes in different sizes, however no matter the size, there is always one side that is 6cm. The sizes include 6x6 and 6x9. Although this size was introduced in 1902, it is still popular today.
220 Film220 film is the same as 120, however there is no black paper so it cannot be changed in daylight. Also, with this film there is double the amount of available shots.
645This film is also known as 6 x 4.5cm. The image size is 56 x 42mm. This film uses 16 shots on the 120 film, and 32 shots on the 220 film. This film does not produce the best quality photographs.
6 x 6
This size is also known as 'Two and a Quarter'. The image size is 56 x 55mm. There are 12 shots on 120 and 24 shots on 220. This is the most popular size used by artists.
6 x 7
This size is also known as the 'Ideal Format'. The image size is 56 x 72mm however the longer dimension varies from 68-72mm depending on the individual camera. There are 10 shots on the 120 and 20 shots on the 220.
6 x 9
This size is also known as 2-1/4 x 3-1/4 inches. The image size is 56 x 84mm. There are 8 shots on the 120 and 16 on the 220.
6 x 10
The image size is 56 x 92mm. There are 7 shots on a roll of 120, however it is rare to be on a 220.
6 x 24
This size is used for panoramic images with 3 shots on the 120 roll and 6 on the 220.
 |
| Medium Format DSLR |
 |
| Medium Format SLR |
Medium Format Camera - Resources:
1) http://www.kenrockwell.com/tech/intro2mf.htm
2) http://photo.net/medium-format-photography-forum/00A0ij
3) http://zackarias.com/for-photographers/gear-gadgets/why-i-moved-to-medium-format-phase-one-iq140-review/
4) http://www.thephoblographer.com/2014/07/01/phoblographers-guide-getting-started-medium-format-film-photography/#.VXbiq89Viko
5) http://photography.tutsplus.com/articles/a-primer-to-digital-medium-format-camera--photo-8716
6 http://www.kenrockwell.com/tech/format.htm#120
Large Format Camera

The Large Format Camera is the same as the Medium Format Camera, however the film size is larger. The film size in the large format cameras include 4x5" and 8x10". The difference between the medium format and the large format is that the quality is better in the large format because the negative is bigger. This means that it will need less magnification when being enlarged, allowing higher quality prints as there is less grain and a larger tonal range.
Large Format Camera - Resources:
1) http://www.bhphotovideo.com/find/Product_Resources/largeformat1.jsp
2) http://www.kenrockwell.com/tech/format.htm#4x5
Twin Lens Reflex

Twin Lens Reflex cameras have been around since the 1870's/80's.'Twin Lens' refers to the two equal lenses, one is used for viewing the image, one is used for taking the photo. 'Reflex' refers to the location of the mirror, which is behind the viewing lens - which allows focusing.
The shutter does not vibrate and is quiet because the mirror is in a separate location to the lens that creates the image, therefore it doesn't need to move. The disadvantage of this camera is that the image may be slightly different to what is seen as there is a very small distance between the separate lenses. Another disadvantage is that you cannot change lenses, for example, you cannot shoot a wide angle photo. However you can screw on filters to create a longer focal length.
Resources:
1) http://www.nelsontan.com/articlespage/twinlenscameras.html
2) http://www.collectorsweekly.com/cameras/twin-lens-reflex
3) http://www.nelsontan.com/articlespage/twinlenscameras.html
4) http://www.tlr-cameras.com/history.htm
5) http://camerapedia.wikia.com/wiki/TLR
DSLR

'DSLR' stands for Digital Single Lens Reflex. The size of the frame is 35mm, like the SLRs. The mirrors are built in so you can see exactly what the photo will be through the viewfinder. The lenses on DSLR's are interchangeable to suit any subject, these lenses include Fish eye, Wide Angle and Telephoto Lenses. The imaging sensors that displays the image through pixels allows the image to have much higher quality compared to a SLR. This camera has many settings so that the camera can be adjusted to suit any subjects from landscape, portraiture or sport.
Full Frame DSLR - This is the same as a DSLR however the sensor is much larger so the images are better quality and more detailed.
Resources:
http://www.all-things-photography.com/digital-slr/
http://www.digitaltrends.com/photography/what-is-a-dslr/
http://www.amateurphotographer.co.uk/buying-advice/why-buy-full-frame-dslrs-17789
Compact System Camera

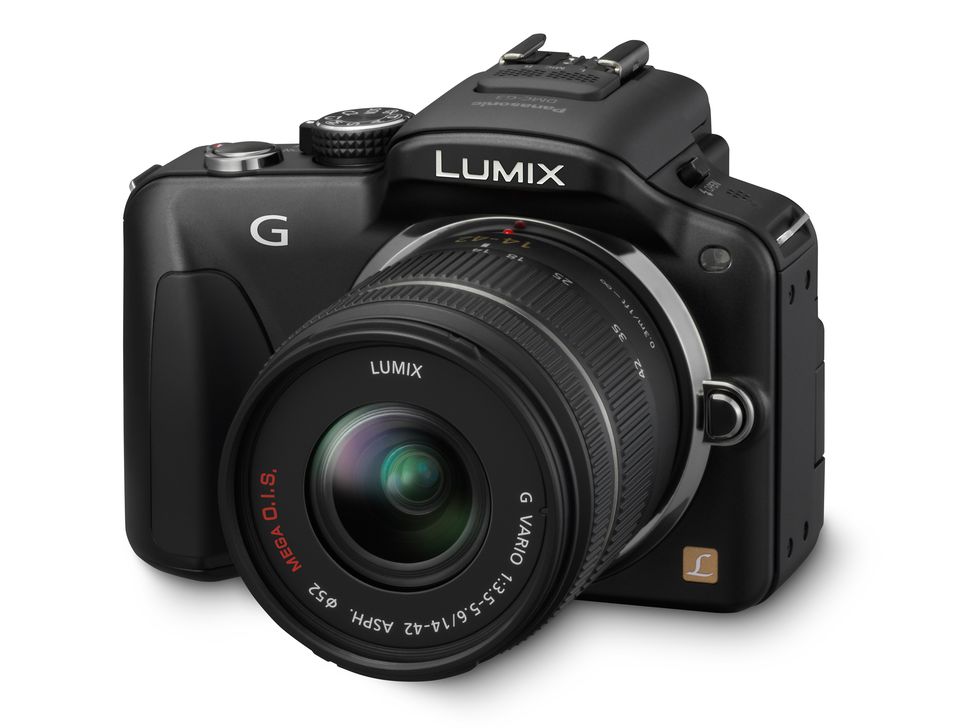
A compact system camera does the same job as a 35mm DSLR and produces good quality photos. The difference between the cameras is that the Compact System is smaller as it does not have any mirrors and sometimes it does not have a viewfinder, the image its transferred onto the sensor through the lens and displayed electronically. The senors are smaller on the compact cameras so the photos may not be as good quality as they may have noise. The disadvantage of these cameras is that they take longer to focus as the focus and exposure settings are set automatically.
Resources:
1) http://www.techradar.com/news/photography-video-capture/cameras/what-is-a-compact-system-camera-1031090/2
2) http://www.whatdigitalcamera.com/buying-advice/what-are-compact-system-cameras-1695
3)http://www.techradar.com/news/photography-video-capture/cameras/what-is-a-compact-system-camera-1031090/
4) http://www.cambridgeincolour.com/tutorials/compact-vs-digital-slr-cameras.htm
Bridge Camera

Bridge cameras use qualitys from DSLRs, compact camera and a point and shoot camera.

Bridge cameras are similar to DSLR's are they have many of the same controls. However uses the quality of the point and shoot as you can not change the lenses, but the camera has a wider focal range than other cameras. These cameras are usually marketed towards travellers for holiday photographs as they are convenient to carry around whilst producing good quality photos. The disadvantage of these cameras is that the sensor is smaller than the ones in the DSLR or the Compact Camera.
Resources:
1) http://www.digitalcameraworld.com/2015/03/10/bridge-camera-tips-using-full-potential/
2) http://www.techradar.com/news/photography-video-capture/cameras/what-is-a-bridge-camera-1059525
Polaroid
The Polaroid camera was founded by Edwin H. Land in 1926. Polaroids are loaded with film packs containing sheets of plastic negatives that are covered in reactive chemicals. When a picture is taken the negative is removed from the pack and placed infront of the camera lens ready for exposure. When the photo is ejected it is passed through rollers which activates the chemical reaction that creates the image.
Resources:
http://www.polaroid.com/history
http://science.opposingviews.com/polaroid-camera-work-1488.html
Lomo - Lomography
The characteristics of Lomography include high contrast, soft focus and vignettes. There are many cameras that produce these images such as: multi lens, panoramic, medium format and 35mm. This style is created using specfic film, however you are able to purchase lenses that will create the effect.
Resources:
1) http://shop.lomography.com/gb/beginners-guide/buying-your-first-camera
2) http://www.1stwebdesigner.com/what-is-lomography/
Mobile Device
All modern mobiles now have camera's which produce decent quality images, however every phone has its own settings,effects,controls,focal length and quality. The Iphone 4 has a 5 mega pixel still camera with an LED flash. With this phone, and many others, the way of controlling the focal point is by tapping on the screen where you'd like the image to focus. With some phones you are now able to purchase add on lenses which include macro, fish eye and wide angle.
Resources:
1) https://support.apple.com/kb/SP587?locale=en_US


 meanings of the circle is unity, life and ongoing. These could all relate to the variation of programmes, and also the variation of the audience as BBC One show different programmes that will suit each individual whether age or general likes and dislikes.